Introduction
In the world of mobile app development, user interaction is key to creating engaging and functional applications. One of the ways to enhance user experience is by implementing interactive components. In this guide, we will walk you through the process of creating a clickable text area using the Pressable component in React Native. We’ll provide you with a detailed step-by-step tutorial, and by the end, you’ll have a solid understanding of how to integrate this functionality into your app.
What is a Clickable Text Area?
A clickable text area is a user interface component that responds to user interaction, such as tapping, by triggering a specific action. In the context of a mobile app, it allows users to perform actions by simply tapping on a designated area of text. This can be particularly useful for creating buttons, links, or interactive elements within your app’s interface.
Why use pressable ?
If you wanna know why use pressable for this example instead of touchable you can check the following post for detailed over view of the features of pressable in react native,
http://alliknows.com/why-use-pressable-component-over-touchable-in-react-native/
Create a Clickable Text Area with Pressable in React Native
Step-by-Step Tutorial
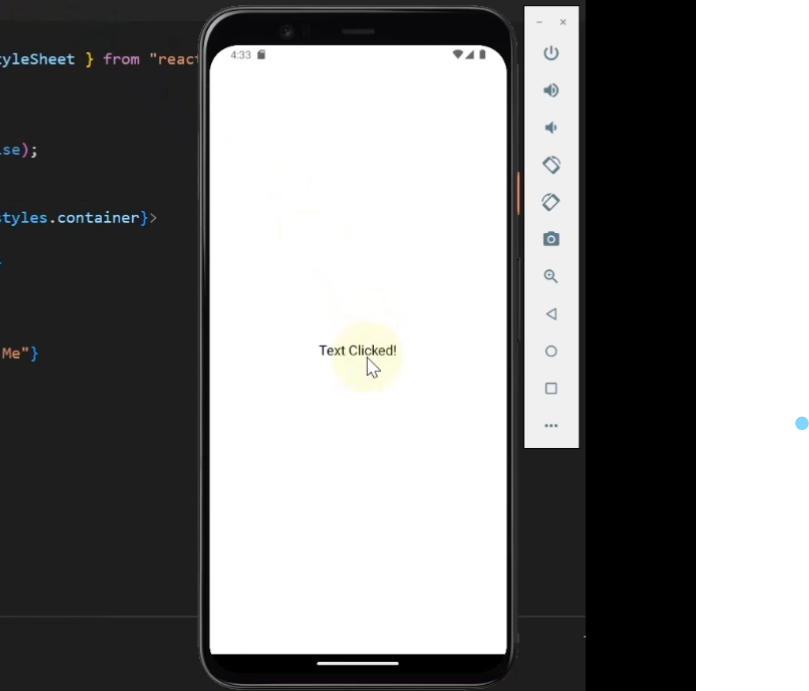
This is the end result you will have:
Step 1: Setting Up the Environment
Before we begin, make sure you have React Native and the necessary development environment set up on your machine. If not, you can follow the link create new project with react native to get started.
Step 2: Importing Dependencies
Open your React Native project and navigate to the screen or component where you want to create the clickable text area. Begin by importing the required components at the top of your file:
import React, { useState } from 'react';
import { ScrollView, Text, StyleSheet, Pressable } from 'react-native';
Step 3: Creating the Clickable Text Area
Inside your functional component, you can create the clickable text area using the Pressable component. Replace the content of the component’s return statement with the following code:
export default function ClickableTextAreaScreen() {
  const [isClicked, setIsClicked] = useState(false);

  return (
    <ScrollView style={styles.container} justifyContent="center" >
      <Pressable
        onPress={() => setIsClicked(!isClicked)}
        style={styles.textArea}
      >
        <Text style={styles.text}>
          {isClicked ? 'Text Clicked!' : 'Click Me'}
        </Text>
      </Pressable>
    </ScrollView>
  );
}
Step 4: Styling the Clickable Text Area
Now, let’s add some styles to our clickable text area. Define the styles using the StyleSheet.create method:
const styles = StyleSheet.create({
  container: {
    flex: 1,
    padding: 20,
  },
  textArea: {
    padding: 20,
    alignItems: 'center',
    justifyContent: 'center',
  },
  text: {
    fontSize: 18,
    color: 'black',
  },
});
Conclusion
Creating a clickable text area using the Pressable component in React Native is a straightforward process that enhances user interaction within your mobile app. By following the steps outlined in this guide, you can implement this functionality and create a more engaging and user-friendly app interface.
Remember that interactive elements are crucial for providing users with a seamless and enjoyable experience, so don’t hesitate to incorporate them into your app’s design. With the knowledge you’ve gained from this tutorial, you’re well-equipped to add interactive text areas to your React Native projects.
FAQs (Frequently Asked Questions)
Q: What is the purpose of the Pressable component?
The Pressable component in React Native is used to create interactive elements that respond to user presses or taps. It allows you to define custom behavior when the element is pressed, making it ideal for creating buttons, links, and interactive text areas.
Q: Can I customize the styles of the clickable text area?
Absolutely! You can customize the styles of the clickable text area by applying different properties to the style prop of the Pressable component. In the example provided, we used background color, padding, and border properties to style the text area.
Q: How does the useState hook work in this example?
The useState hook is a React hook that allows you to add state management to functional components. In our example, we use it to toggle the text displayed inside the clickable text area when it’s pressed. The isClicked state variable keeps track of whether the text has been clicked.
Q: Is the Pressable component the only way to create interactive elements in React Native?
No, there are other components like TouchableOpacity and TouchableHighlight that can also be used to create interactive elements. Each of these components has its own unique features and use cases, so you can choose the one that best suits your needs.
Pingback: React Native Swipeable not working in Android (Expo Cli) ? - AlliKnows